Recurring route planning is the process of designing and optimizing transportation routes that are repeated on a regular basis—daily, weekly, or monthly. This approach is commonly used in industries such as logistics, field services, public transportation, and waste collection, where operations follow consistent schedules and customer needs are predictable over time.
By leveraging recurring route planning, organizations can improve operational efficiency, reduce fuel consumption, minimize travel time, and ensure consistent service quality. Ultimately, recurring route planning helps businesses balance reliability with flexibility, enabling long-term cost savings and better resource utilization.
This blog post explains how to make Recurring Route Plans in Routin Team.
If you're not a member yet, click here for a free 14-day trial
The process is completed in seven steps.
1.Click Recurring Plans on the left side menu.
![]()
2.On Recurring Plans screen click Add New Recurring Plan.
![]()
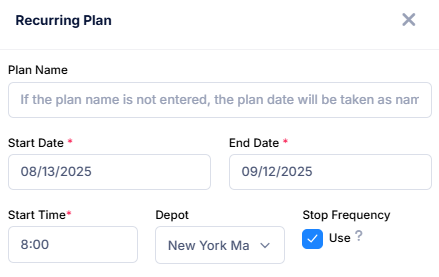
Type the name of the plan. Select start and end dates of the recurring plan. Select route starting hour (Start Time). Select the depot where the routes will start or end. If you want to assign visit frequencies for some stops, get the Stop Frequency field selected.
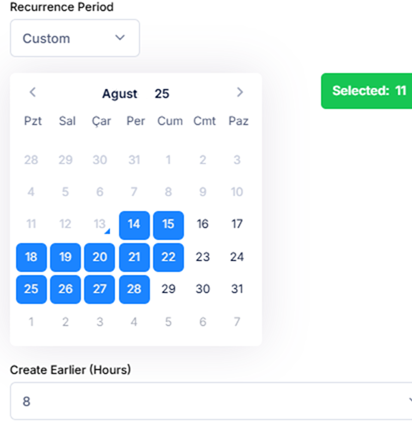
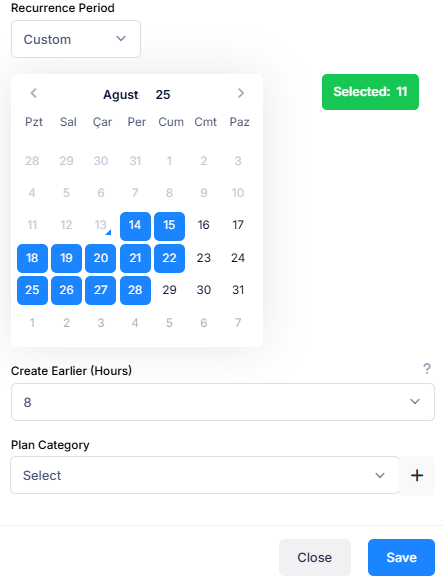
Select Recurrence Period. If you are not sure about the recurrence period, select Custom and a calendar will be visible. Click the days that your route will be repeated on the calendar. You can select multiple days and months.
You do not have to send the routes to the drivers manually. System will send the routes to the related drivers automatically. All you need to do is selecting the how many hours earlier the routes should be sent. Select the Create Earlier option for this purpose.Then click Save.
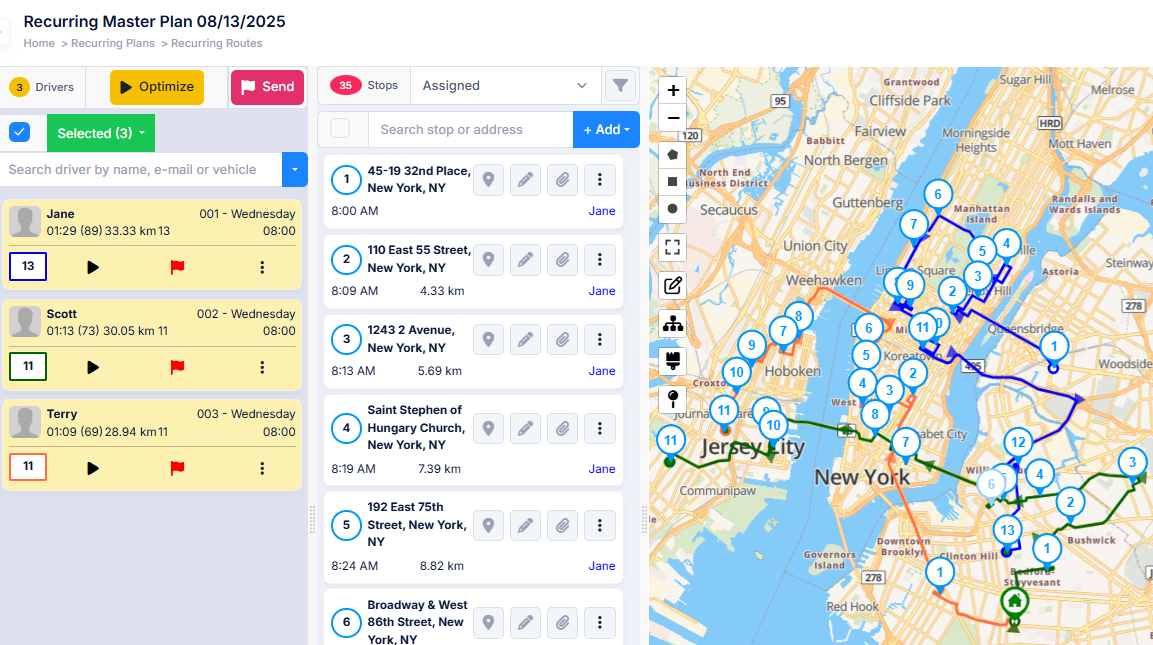
3.The Plan Screen displays three sections. Drivers are displayed on the left, stops are displayed in the middle, and the map is displayed on the right. The depot location is marked on the map.
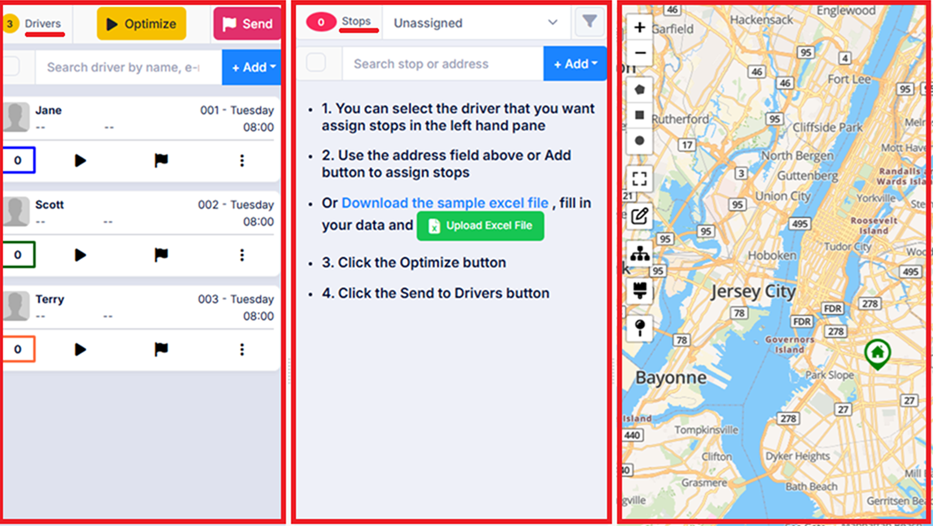
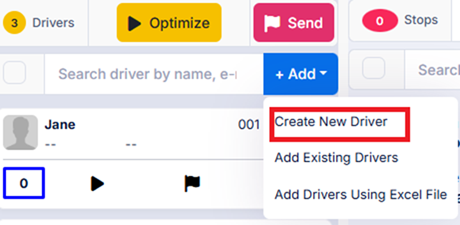
4.Drivers defined for the depot will be automatically added to the plan. To create a new driver, click Add button above the Drivers section, then click the Create New Driver button and define the driver. (For more information, see the blog post "How to create a driver?")
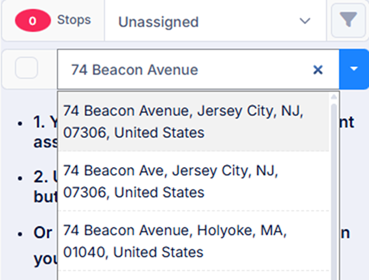
5.Add stops for drivers to visit. There are several ways to do this. You can add addresses one by one by entering the address (house number and street/avenue name) in Address Search field above the Stops section and selecting the address from the options provided.
To upload multiple stops at once, Check blog post How to Upload Multiple Stops Using Excel File?
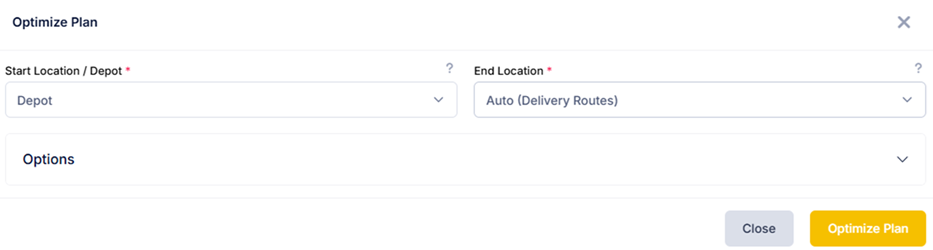
6. Click Optimize button in Planning Screen
![]()
Select Start and End locations and Click Optimize.
7.Result will be displayed on map and on stops section. Resulting routes will be sent to the drivers automatically in recurrence period. You cannot send the routes manually.